Advanced installation and activation
Overview
This page covers advanced installation and activation scenarios for Tabular Editor 3: manual (offline) activation, registry-based license management, silent deployment, and Enterprise seat administration.
For the standard activation flow, see Installation and Activation.
Manual activation (no internet)
If you do not have access to the internet, for example due to a proxy, Tabular Editor prompts you to do a manual activation.
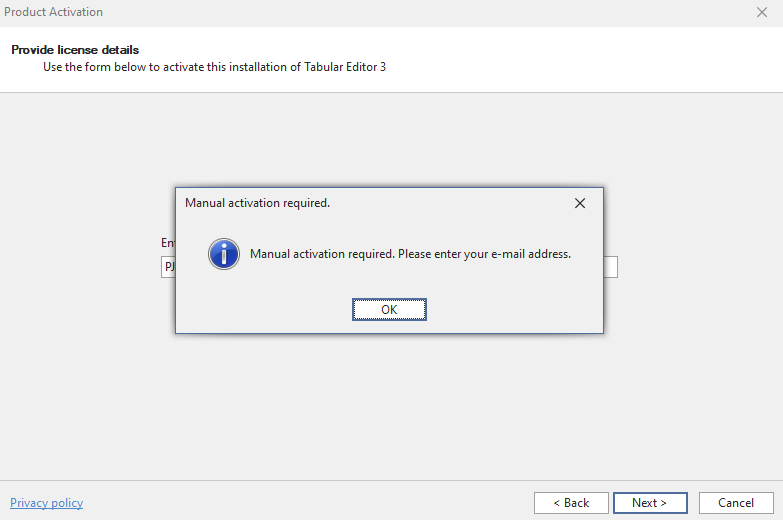
After entering your e-mail, a dialog appears with a link to an activation key. Copy the URL and open it in a web browser that is connected to the internet.
The URL returns a JSON object:

Copy the full JSON object and paste it into the dialog. Your manual activation dialog ends up looking like the screenshot below.

Your Tabular Editor 3 license is then verified.
Changing seats on Enterprise Edition
To change an Enterprise seat, deregister the existing user from the seat through the Tabular Editor Self-Service portal. The subscription owner or license administrator creates an account, or logs in with an existing one, to administer the license seats.
Note
Changing a user is only possible on the Enterprise Edition.
Registry details
Tabular Editor 3 uses the Windows Registry to store activation details.
To view the current license key assigned to the machine, run the following command in the Windows Command Prompt (Start > Run > cmd.exe):
REG QUERY "HKCU\Software\Kapacity\Tabular Editor 3" /v LicenseKey
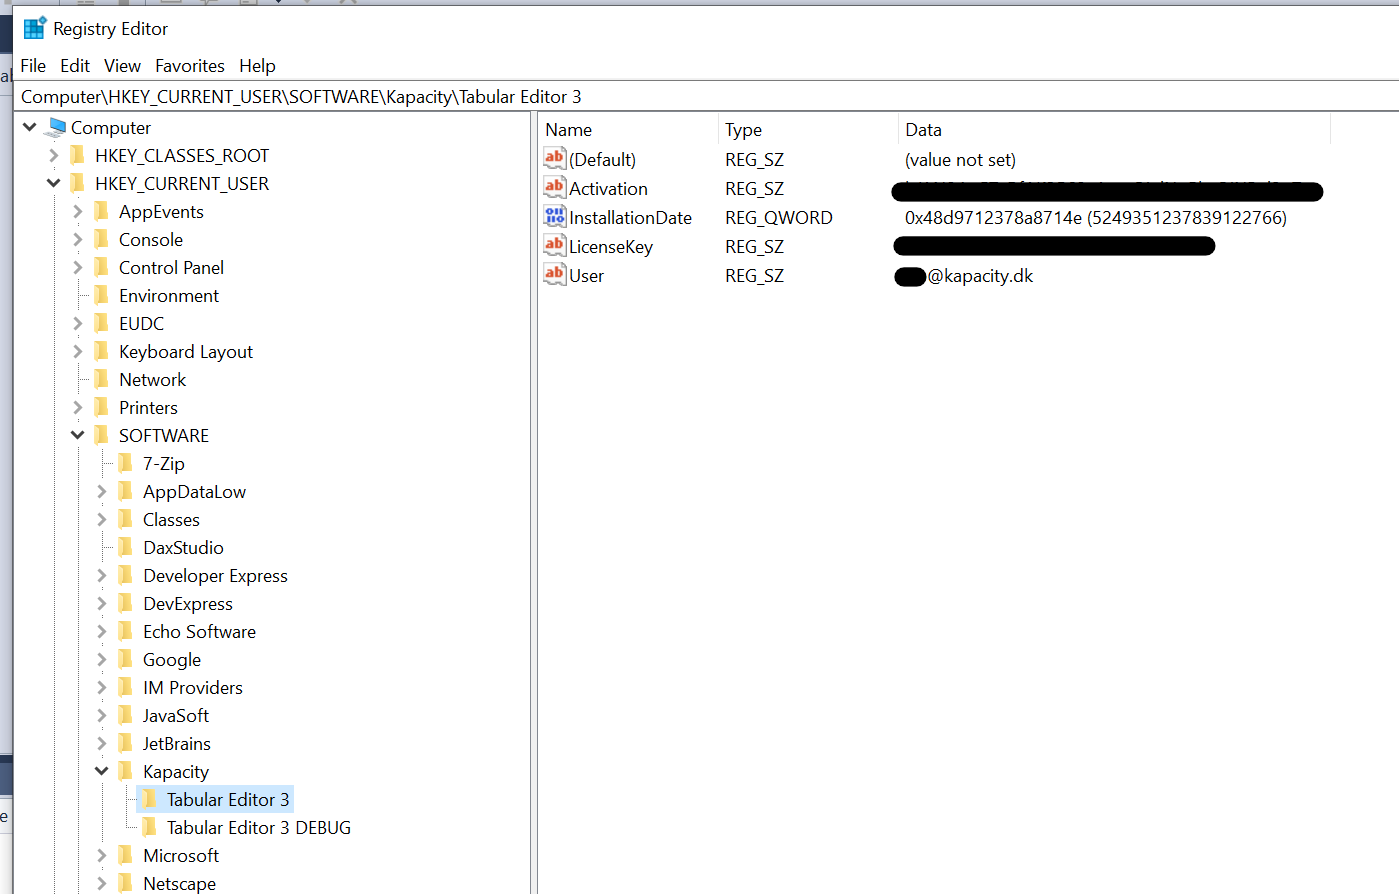
You can also use regedit.exe (Windows Registry Editor) and navigate to HKEY_CURRENT_USER\SOFTWARE\Kapacity\Tabular Editor 3 to view and modify the LicenseKey and User values.
A system administrator can also proactively assign Tabular Editor 3 licenses to a machine by specifying the LicenseKey and User values under each user's SOFTWARE\Kapacity\Tabular Editor 3 registry key. See Silent installation and license pre-provisioning for the full deployment procedure.
Changing a license key through the registry
If, for any reason, you cannot change the license key using the standard Change license key option in the About Tabular Editor dialog, reset the license through the Registry Editor:
- Close all instances of Tabular Editor 3.
- Open the Registry Editor in Windows (Start > Run > regedit.msc).
- Locate
HKEY_CURRENT_USER\SOFTWARE\Kapacity\Tabular Editor 3(see screenshot above). - Delete all values within this key.
- Close the Registry Editor and restart Tabular Editor 3.
Alternatively, run the following command in a Windows Command Prompt (Start > Run > cmd.exe):
REG DELETE "HKCU\Software\Kapacity\Tabular Editor 3" /va
The next time you launch Tabular Editor 3, you are prompted for a license key, just as when the tool was first installed on the machine.
Silent installation and license pre-provisioning
You can deploy Tabular Editor silently and pre-provision the license through the Windows Registry.
Install silently (no UI, no reboot):
msiexec /i TabularEditor.<version>.x64.Net8.msi /qn /norestart /l*v C:\Temp\TE3_install.logTo include the AI Assistant feature, specify the
ADDLOCALproperty. The AI Assistant is not installed by default.msiexec /i TabularEditor.<version>.x64.Net8.msi /qn /norestart ADDLOCAL=MainFeature,AIAssistant /l*v C:\Temp\TE3_install.logMSI Feature Description Installed by default MainFeatureCore Tabular Editor 3 application Yes (Required) AIAssistantAI Assistant for Tabular Editor 3 No Note
When using
ADDLOCAL, includeMainFeaturealongside any optional features. Specifying onlyAIAssistantwithoutMainFeatureresults in an incomplete installation.
You can also use /package instead of /i. Replace <version> with the actual version string. Use the ARM64 MSI if applicable.
For details on available MSI command-line options, see the official Microsoft documentation: Microsoft Standard Installer command-line options - Win32 apps | Microsoft Learn
Write the license to the Registry before the first launch of the application:
REM Per-user license key (HKCU)
REG ADD "HKCU\Software\Kapacity\Tabular Editor 3" /v LicenseKey /t REG_SZ /d YOUR-25-CHAR-KEY /f
If you are using an Enterprise Edition license key, also set the licensed user's e-mail:
REG ADD "HKCU\Software\Kapacity\Tabular Editor 3" /v User /t REG_SZ /d user@example.com /f
Notes
- The installer does not accept a license parameter; licensing is handled via the Registry entries above.
- Keys are stored under HKCU (per-user). Ensure the commands run in the context of the target user (for example via a logon script) so the values are written to the correct profile.
- For additional keys and values, see Registry details.